Note
Go to the end to download the full example code.
Clipping the model
This example demonstrates the how to use the
qtcad.builder.Builder.clip_model() operation:
- Builder.clip_model(height: float | None = None)
[🏗️ Operation] Take the intersection of the entire model with the currently selected shapes extruded by
height.
- Parameters:
height – The height by which to extrude the shape. If
None, the z-coordinate will be set to the bottom of the model and the height will be equal to the height of the model.
We begin by importing the necessary modules and defining some shapes to work with.
from qtcad.builder import Builder
from qtcad.builder import Mask, Polygon, Circle

circle_1 = Circle(radius=0.5).translated(-0.6, 0)
circle_2 = Circle(radius=0.5).translated(0.6, 0)
top_mask = Mask(name="top", shapes=[circle_1, circle_2])

square = Polygon.box(3, 3).centered()
bottom_mask = Mask(name="bottom", shapes=[square])

clip_shape = Polygon.regular(3, 2).centered()
clip_mask = Mask(name="clip", shapes=[clip_shape])
[06:24:42 PM] INFO     Auto-named Circle instance to 'circle_1'        masks.py:240
              INFO     Auto-named Circle instance to 'circle_2'        masks.py:240
              INFO     Auto-named Polygon instance to 'square'         masks.py:240
              INFO     Auto-named Polygon instance to 'clip_shape'     masks.py:240
Next we create a qtcad.builder.Builder instance, add the
masks defined above, and build a model based on extrusion of the
shapes in the bottom and top masks.
builder = Builder().add_mask(bottom_mask).add_mask(top_mask).add_mask(clip_mask)

(
    builder.use_mask("bottom")
    .extrude(0.1)
    .use_mask("top")
    .extrude(0.1)
    .view(
        show_volume_faces=True,
        save="figs/clip_before.png",  # caption: Model before clipping;
        angles=(-45, 0, 45),
    )
)
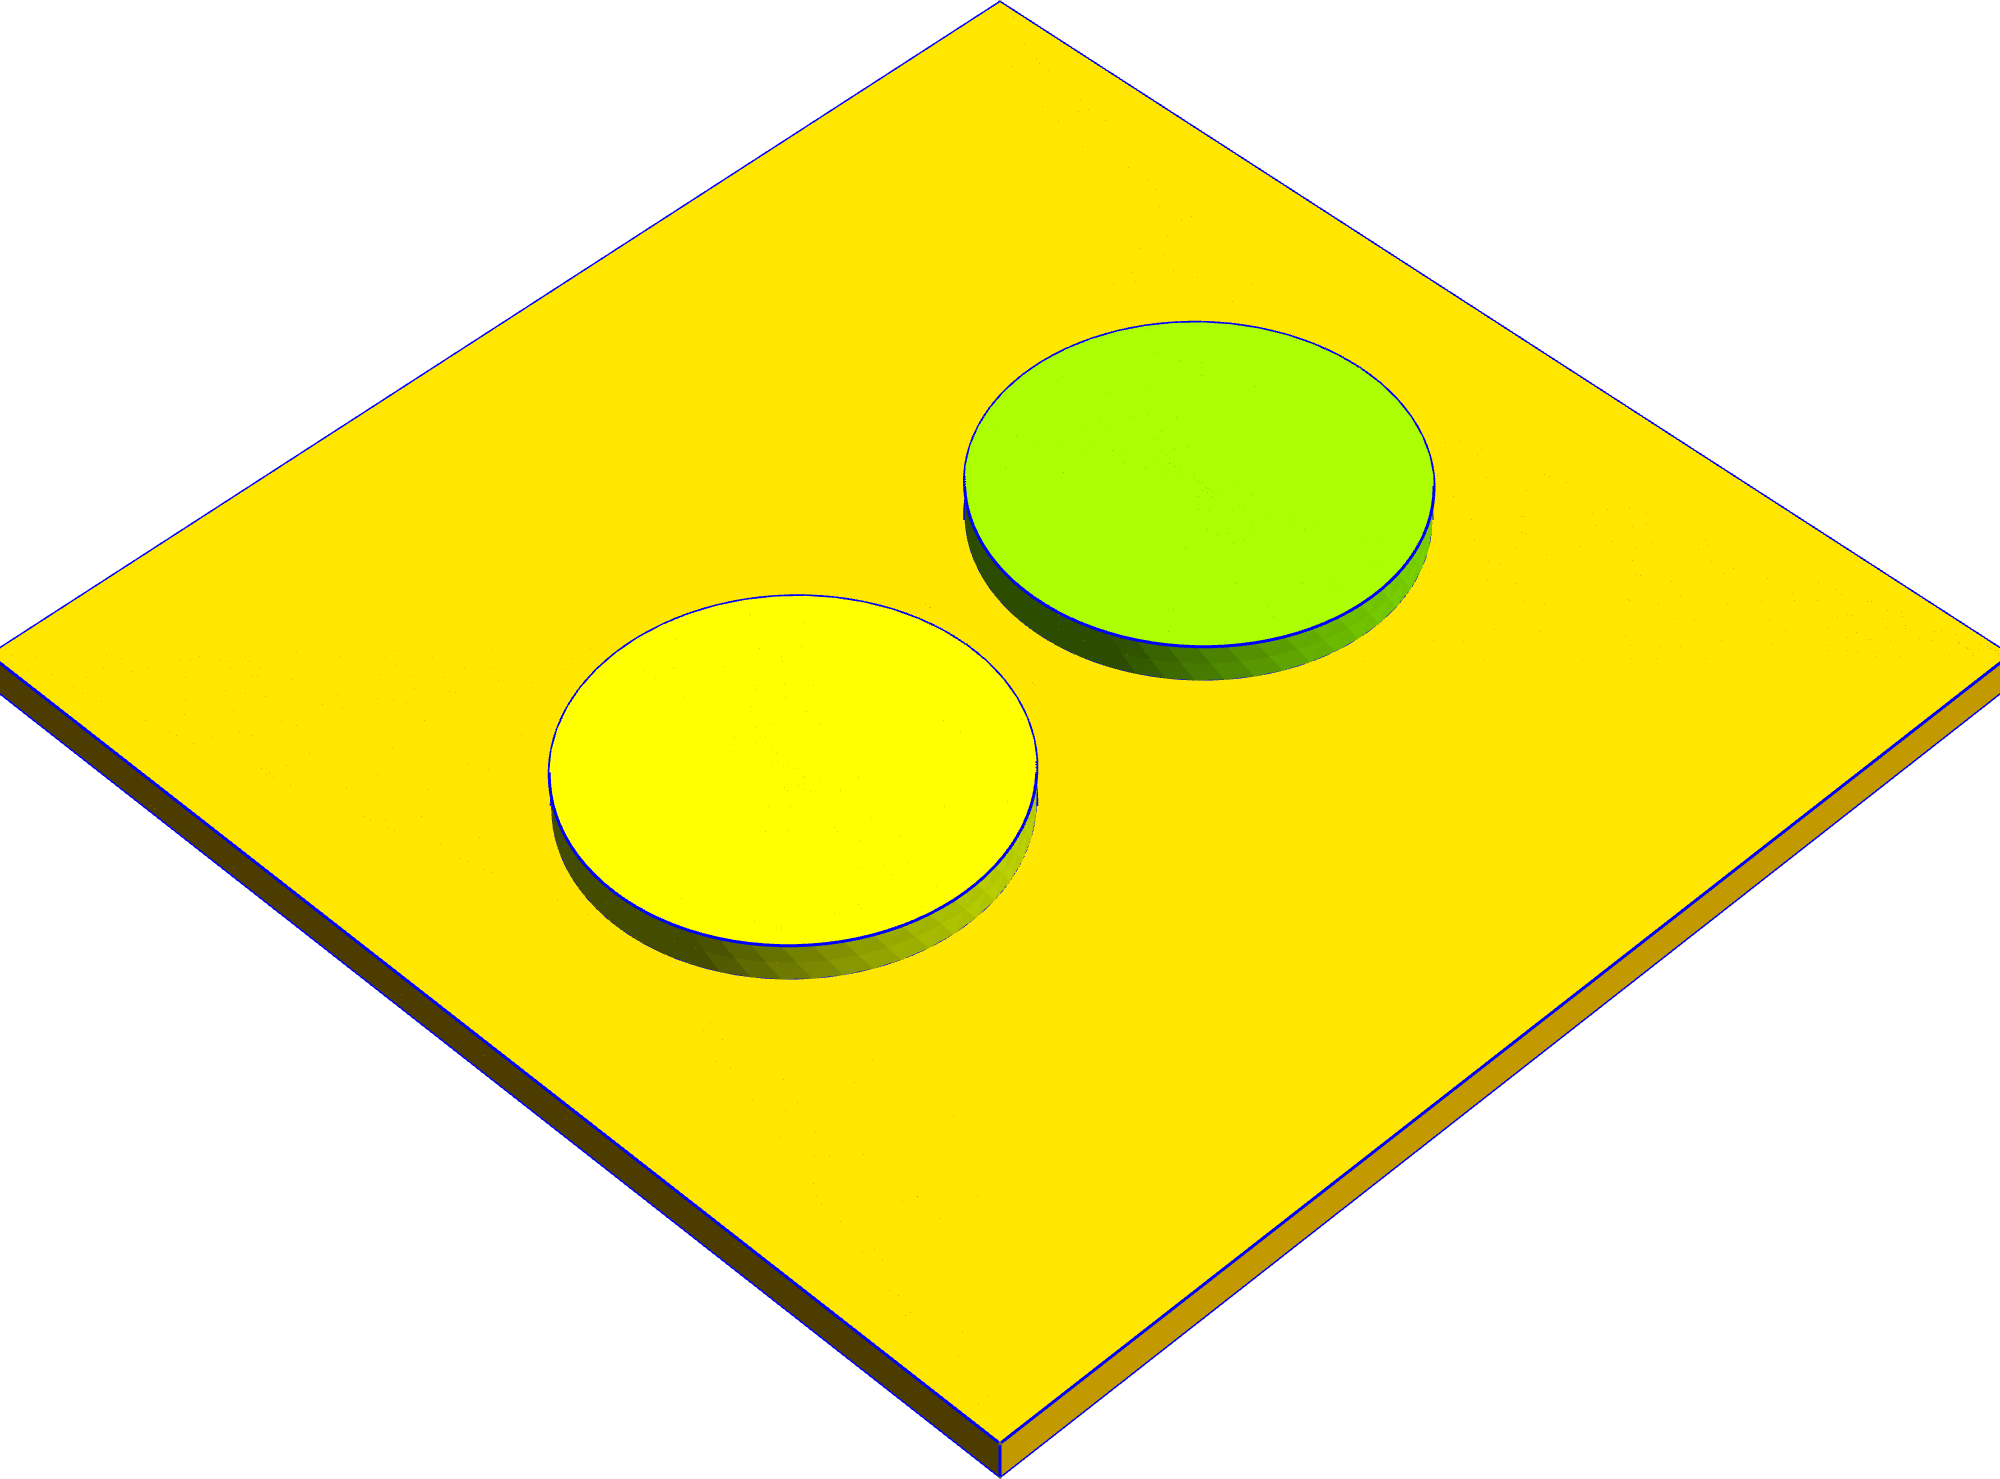
Fig. 4 Model before clipping
[18:24:42] INFO     Using mask 'bottom' (implicitly selecting       _builder.py:827
                    shapes [Polygon 0 'square'])
           INFO     Extruding shape 0 from mask 'bottom' with name _builder.py:2892
                    'square' by 0.1 at z=0
           INFO     Creating new physical group of dimension 2     _builder.py:2676
                    with name 'square_bottom'
           INFO     Creating new physical group of dimension 2     _builder.py:2676
                    with name 'square_side'
           INFO     Creating new physical group of dimension 2     _builder.py:2676
                    with name 'square_top'
           INFO     Creating new physical group of dimension 3     _builder.py:2676
                    with name 'square'
           INFO     Setting z-coordinate to 0.1                     _builder.py:929
           INFO     Using mask 'top' (implicitly selecting shapes   _builder.py:827
                    [Circle 0 'circle_1', Circle 1 'circle_2'])
           INFO     Extruding shape 0 from mask 'top' with name    _builder.py:2892
                    'circle_1' by 0.1 at z=0.1
           INFO     Creating new physical group of dimension 2     _builder.py:2676
                    with name 'circle_1_bottom'
           INFO     Creating new physical group of dimension 2     _builder.py:2676
                    with name 'circle_1_side'
           INFO     Creating new physical group of dimension 2     _builder.py:2676
                    with name 'circle_1_top'
           INFO     Creating new physical group of dimension 3     _builder.py:2676
                    with name 'circle_1'
           INFO     Extruding shape 1 from mask 'top' with name    _builder.py:2892
                    'circle_2' by 0.1 at z=0.1
           INFO     Creating new physical group of dimension 2     _builder.py:2676
                    with name 'circle_2_bottom'
           INFO     Creating new physical group of dimension 2     _builder.py:2676
                    with name 'circle_2_side'
           INFO     Creating new physical group of dimension 2     _builder.py:2676
                    with name 'circle_2_top'
           INFO     Creating new physical group of dimension 3     _builder.py:2676
                    with name 'circle_2'
           INFO     Identifying potential intersections...        fragmenter.py:290
[18:24:43] INFO     Fragmenting...                                fragmenter.py:320
           INFO     Setting z-coordinate to 0.2                     _builder.py:929
           INFO     Quick meshing with 2D algorithm                _builder.py:1684
                    FrontalDelaunay, 3D algorithm HXT and 12
                    threads
[18:24:44] INFO     Saving figure                                  _builder.py:1991

<qtcad.builder.builder.Builder object at 0x7bb2f18986e0>
Finally, we use qtcad.builder.Builder.clip_model() to clip the
model using the shape defined in the clip mask.
(
    builder.use_mask("clip")
    .clip_model()
    .view(
        show_volume_faces=True,
        save="figs/clip_after.png",  # caption: Model after clipping;
        angles=(-45, 0, 45),
    )
)
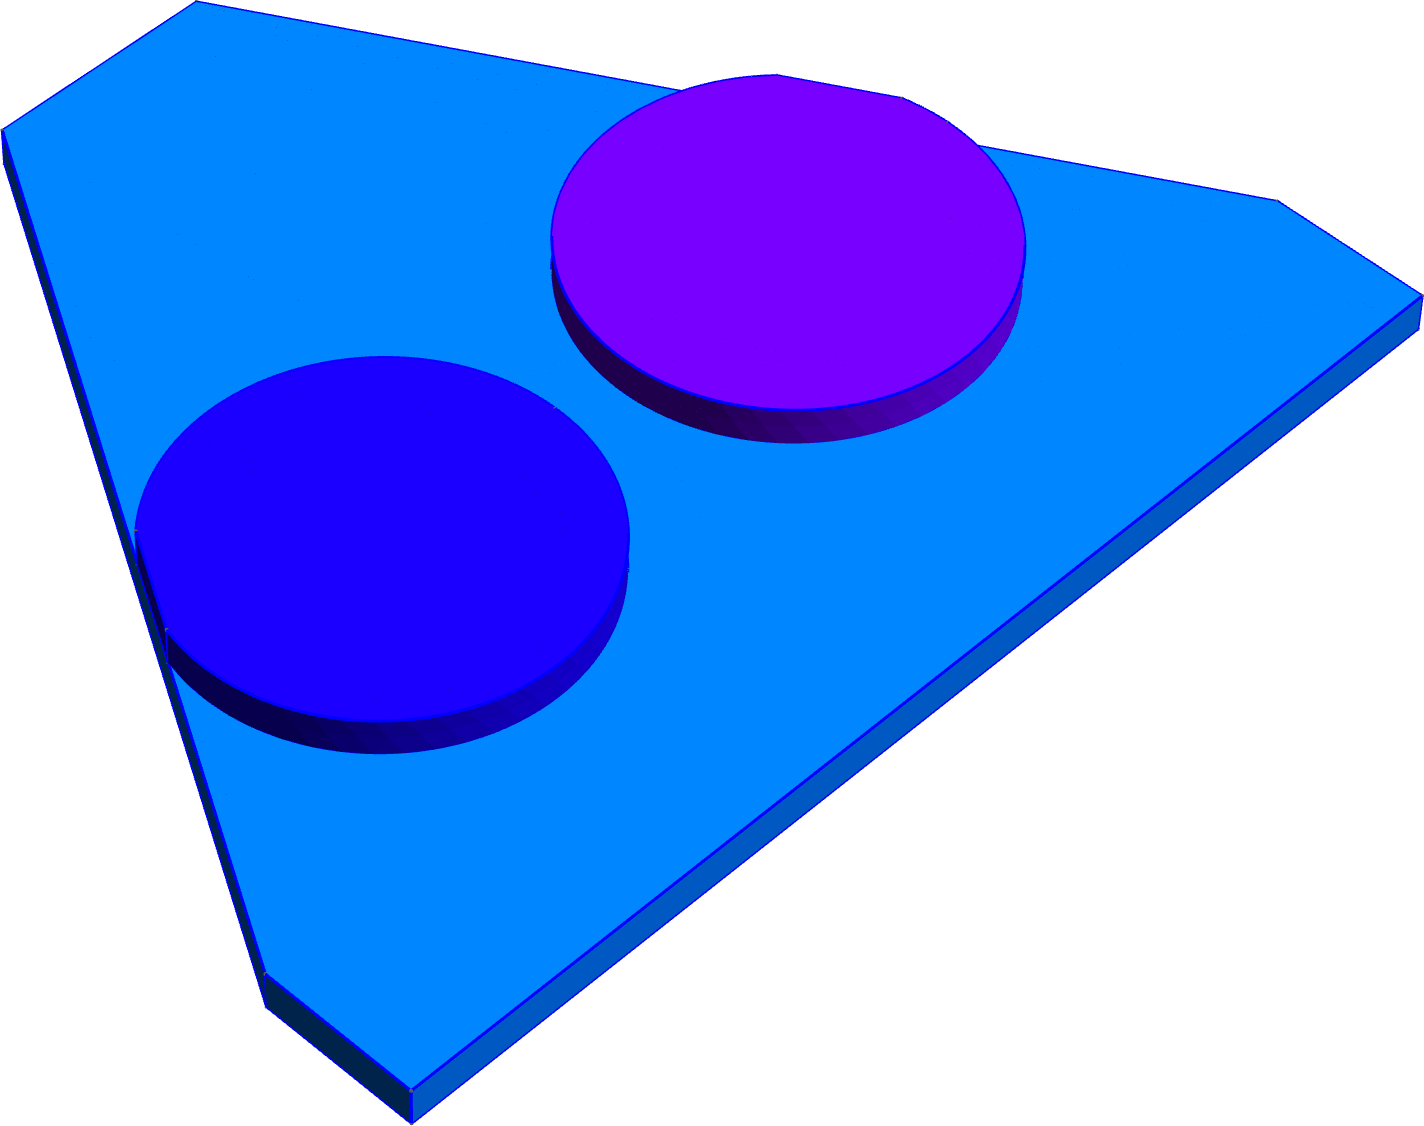
Fig. 5 Model after clipping
[18:24:45] INFO     Using mask 'clip' (implicitly selecting shapes  _builder.py:827
                    [Polygon 0 'clip_shape'])
           INFO     Clipping model to volume extruded from shapes  _builder.py:4002
                    [Polygon 0 'clip_shape'] at z=0.2 with height
                    None.
           INFO     Creating new physical group of dimension 3     _builder.py:2676
                    with name '__clip'
           INFO     Creating new physical group of dimension 2     _builder.py:2676
                    with name '__clip_side'
           INFO     Creating new physical group of dimension 2     _builder.py:2676
                    with name '__clip_top'
           INFO     Creating new physical group of dimension 2     _builder.py:2676
                    with name '__clip_bottom'
           INFO     Identifying potential intersections...        fragmenter.py:290
           INFO     Fragmenting...                                fragmenter.py:320
           INFO     Quick meshing with 2D algorithm                _builder.py:1684
                    FrontalDelaunay, 3D algorithm HXT and 12
                    threads
[18:24:46] INFO     Saving figure                                  _builder.py:1991

<qtcad.builder.builder.Builder object at 0x7bb2f18986e0>
We see that the model has been clipped according to the triangle
shape defined in the clip mask.
To illustrate the clipping shape, we can also extrude it on its own:
(
    builder.set_z(0)
    .fill_mode()
    .extrude(2)
    .view(
        show_volume_faces=True,
        save="figs/clip_full.svg",  # caption: Visualization of the shape we clipped to;
        angles=(-45, 0, 45),
        volume_labels=True,
    )
)

Fig. 6 Visualization of the shape we clipped to
[18:24:47] INFO     Setting z-coordinate to 0                       _builder.py:929
           INFO     Extruding shape 0 from mask 'clip' with name   _builder.py:2892
                    'clip_shape' by 2 at z=0
           INFO     Creating new physical group of dimension 2     _builder.py:2676
                    with name 'clip_shape_bottom'
           INFO     Creating new physical group of dimension 2     _builder.py:2676
                    with name 'clip_shape_side'
           INFO     Creating new physical group of dimension 2     _builder.py:2676
                    with name 'clip_shape_top'
           INFO     Creating new physical group of dimension 3     _builder.py:2676
                    with name 'clip_shape'
           INFO     Identifying potential intersections...        fragmenter.py:290
           INFO     Fragmenting...                                fragmenter.py:320
           INFO     Setting z-coordinate to 2                       _builder.py:929
           INFO     Quick meshing with 2D algorithm                _builder.py:1684
                    FrontalDelaunay, 3D algorithm HXT and 12
                    threads
[18:24:49] INFO     Saving figure                                  _builder.py:1991

<qtcad.builder.builder.Builder object at 0x7bb2f18986e0>
Total running time of the script: (0 minutes 9.219 seconds)